Prepare for a Home Inspection: Your 20-Point Checklist
Podcast Overview

For home sellers, the home inspection is often one of the most stressful hurdles in the entire transaction process. It’s the moment a professional walks through your property with a fine-tooth comb, and the resulting report can make or break a deal. But what if you could walk into inspection day with confidence, knowing you’ve done everything possible to ensure a smooth process?
Preparation is power. A well-prepared home not only demonstrates pride of ownership but also builds trust and goodwill with potential buyers. It can lead to a cleaner report with fewer "red flag" items, simplifying negotiations and keeping your sale on track.
This guide provides an essential 20-point checklist designed to help you, the seller, prepare your home for a successful inspection. By tackling these items, you can minimize surprises, showcase your home in its best light, and pave the way for a faster, more seamless closing.
Why a Little Preparation Goes a Long Way
Before we dive into the checklist, let's quickly cover why this effort is so important:
- Minimizes "Easy Fix" Findings: Many inspection items are small issues you can easily address beforehand, like a leaky faucet or a burned-out lightbulb. Fixing these prevents them from cluttering the report and making it look more alarming than it is.
- Builds Buyer Confidence: A clean, accessible, and well-maintained home signals to the buyer and their agent that the property has been cared for. This psychological boost can be invaluable during negotiations.
- Avoids Delays: If an inspector can't access a key area like the attic or electrical panel, they may have to schedule a return visit, causing delays and adding costs.
- Shows Respect for the Process: Making the inspector's job easier is a professional courtesy that reflects well on you as the seller.
The Ultimate Pre-Inspection Checklist
We’ve broken down our 20-point checklist into four logical categories: Accessibility, Major Systems, Interior Details, and Exterior Areas.
Part 1: Accessibility is Key (The Inspector's Golden Rule)
If the inspector can't access it, they can't inspect it. This is the #1 reason for incomplete reports and follow-up visits.
- 1. De-Clutter Key Areas: Clear any storage, furniture, or debris from around the furnace, water heater, air conditioner, and electrical panel. Inspectors need at least three feet of clear space to work safely.
- 2. Grant Attic and Crawl Space Access: Ensure the path to any attic hatches or crawl space entrances is completely clear. If it’s in a closet, remove clothing and stored items.
- 3. Unlock Everything: Unlock all doors, windows, gates, sheds, garage doors, and electrical panel covers. Have all necessary keys and remotes laid out in a visible location, like the kitchen counter.
- 4. Secure Your Pets: Even the friendliest pet can be a distraction or a perceived hazard. It's best to have them crated, secured in a room with a clear sign, or removed from the property for the duration of the inspection (typically 2-4 hours).
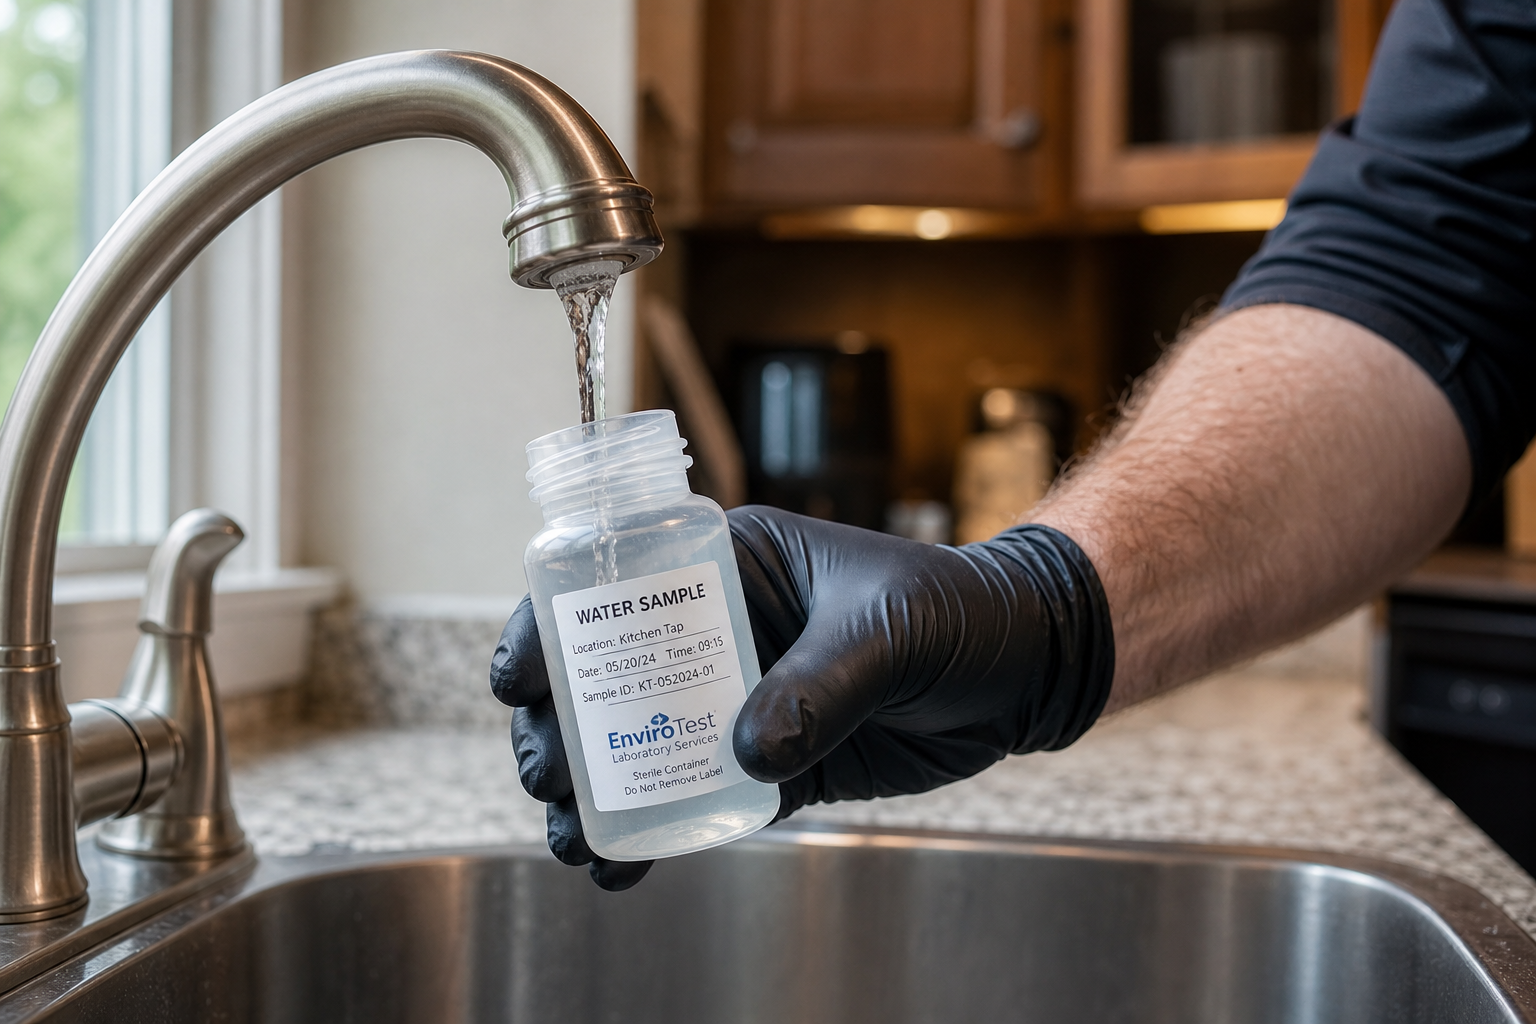
- 5. Leave Utilities On: Ensure all utilities—water, electricity, and gas—are connected and operational. An inspector cannot test systems or appliances if they are turned off.
Part 2: Major Systems Check-Up
These are the big-ticket items. While you're not expected to perform major repairs, a quick check-up can prevent minor issues from appearing on the report.
- 6. HVAC System: Replace dirty furnace and air conditioner filters. A clean filter is an easy and inexpensive way to show proper maintenance.
- 7. Plumbing Leaks: Do a quick visual check under all sinks (kitchen and bathrooms) and around toilets for any signs of active leaks or water stains. Fix any dripping faucets.
- 8. Electrical Panel and Outlets: Replace any burned-out lightbulbs. This prevents the inspector from having to determine if the issue is the bulb or the fixture's wiring. If you know which breakers control which rooms, ensure the panel is clearly labeled.
- 9. Water Heater: Confirm the pilot light is lit for gas water heaters. Check around the base for any signs of leaking.
- 10. Smoke and Carbon Monoxide Detectors: Test all detectors and replace any dead batteries. This is a critical safety item that inspectors will always check.
Part 3: The Interior Walk-Through
Small details inside the home can add up on a report. A quick walk-through can catch many of them.
- 11. Doors and Windows: Check that all doors and windows open, close, and lock properly. Repair any broken window panes or torn screens.
- 12. Run the Appliances: Briefly run the dishwasher, test the stove burners, and check the garbage disposal to ensure they are in working order.
- 13. Test All Faucets and Toilets: Run water at every faucet to check for pressure and drainage speed. Flush every toilet to ensure it functions correctly and doesn't continue to run.
- 14. Look for Water Stains: Check ceilings (especially under bathrooms and roofs) and around window frames for any discoloration that could indicate a past or present leak.
- 15. Inspect Caulking: Examine the caulking around bathtubs, showers, and sinks. If it's cracked, peeling, or moldy, a fresh bead of caulk is a simple and impactful DIY fix.
Part 4: Curb Appeal and Exterior Details
The inspector's first impression starts outside.
- 16. Trim Landscaping: Trim any tree branches, bushes, or vines that are touching the house siding or roof. Clear vegetation away from the foundation and the exterior AC compressor unit.
- 17. Clean Gutters and Downspouts: Clear gutters of leaves and debris. Ensure downspouts are properly attached and directing water away from the foundation.
- 18. Check the Perimeter: Walk around the foundation and siding, looking for any obvious cracks, damage, or signs of wood rot that you might want to address.
- 19. Secure Decks and Railings: Check that all handrails and guardrails on decks, stairs, and porches are sturdy and secure.
- 20. Gather Repair Documentation: If you've recently had major work done (e.g., a new roof, HVAC system, or updated electrical), gather the receipts and warranty information and leave them for the inspector and buyer to review.
On Inspection Day: The Final Step
Your work is done. On the day of the inspection, turn on all the lights, open the blinds to let in natural light, and then leave the property. Allowing the inspector and the buyer to review the home without the seller present is standard practice and makes everyone more comfortable.
From a Clean Report to a Smooth Closing: What Happens Next?
As a seller, your preparation is aimed at producing the cleanest possible inspection report. But even with the most diligent prep work, no home is perfect. The buyer's agent will receive the report, which can be a dense, technical document running 40 pages or more. Their next job is to work with the buyer to decipher the findings and prepare a professional repair request or "inspection response."
This is where the process can get complicated, bogged down by confusing jargon, inflated repair estimates, and poorly written requests. It’s a major pain point for agents and a source of friction in negotiations.
This is the exact challenge InspectionResponse.com was built to solve.
Our AI-powered platform helps the buyer's agent transform a complex PDF inspection report into a clear, actionable, and professional repair request in minutes, not hours. By using smart analysis, it identifies key findings, provides credible repair cost and time estimates, and helps the agent draft a polished, easy-to-understand addendum.
While you, as the seller, won't use the tool directly, you benefit immensely when the buyer's agent on the other side of the deal does. You receive a well-organized, reasonable, and data-driven repair request, which eliminates confusion and sets the stage for a fair and efficient negotiation. It turns a potentially adversarial process into a collaborative, solution-focused conversation.
Conclusion
Preparing your home for inspection isn’t about hiding problems; it’s about presenting your home accurately and professionally. By following this 20-point checklist, you're not just fixing small issues—you're investing in a smoother, faster, and more successful sale. You’re taking control of the narrative and setting a positive tone for the final stages of your real estate journey.
If your real estate agent isn't already using tools that streamline the post-inspection process, encourage them to explore how modern solutions like InspectionResponse.com are creating better outcomes for everyone involved.
Additional Resources
Briefing Document & Key Takeaways
Briefing on Home Inspection Preparation and Post-Inspection Negotiation
Executive Summary
This briefing synthesizes a comprehensive strategy for home sellers to navigate the critical home inspection phase of a real estate transaction. The core thesis is that proactive and thorough preparation is a powerful tool for ensuring a smoother, faster, and more successful sale. By addressing minor issues and ensuring full accessibility, sellers can build buyer confidence, minimize "red flag" items on the inspection report, and prevent costly delays.
The strategy is detailed in a 20-point checklist organized into four key areas: Accessibility, Major Systems, Interior Details, and Exterior Areas. Following this checklist allows a seller to present their home professionally and accurately, setting a positive tone for negotiations.
Furthermore, the document addresses a significant "pain point" in the post-inspection process: the translation of a dense, technical inspection report into a clear and reasonable repair request. An AI-powered platform, InspectionResponse.com, is identified as a solution used by buyer's agents to streamline this process. While not a tool for sellers directly, its use benefits them by fostering a more collaborative, data-driven negotiation environment, transforming a potentially adversarial stage into a solution-focused conversation.
The Strategic Importance of Pre-Inspection Preparation
Preparation is presented not as a method for hiding problems, but as an investment in a successful transaction. The effort demonstrates pride of ownership and builds crucial trust with potential buyers. A well-prepared home signals that the property has been cared for, a psychological factor that can be invaluable during negotiations.
The primary benefits of undertaking pre-inspection preparations are:
• Minimizes "Easy Fix" Findings: Addressing small, correctable issues—such as leaky faucets or burned-out lightbulbs—prevents them from cluttering the final report and making it appear more alarming than it is.
• Builds Buyer Confidence: A clean, accessible, and well-maintained property provides a strong positive signal to the buyer and their agent.
• Avoids Delays: Ensuring the inspector has unimpeded access to all key areas (e.g., electrical panels, attics) prevents the need for follow-up visits, which cause delays and may add costs.
• Shows Respect for the Process: Facilitating the inspector's work is a professional courtesy that reflects positively on the seller and contributes to a smoother overall experience.
Comprehensive 20-Point Preparation Checklist
The following checklist is organized into four logical categories to guide the seller's preparation efforts.
Part 1: Accessibility is Key
The primary rule for an inspection is that if an area or system cannot be accessed, it cannot be inspected, leading to an incomplete report.
1. De-Clutter Key Areas: Provide at least three feet of clear space around the furnace, water heater, air conditioner, and electrical panel by removing storage, furniture, or debris.
2. Grant Attic and Crawl Space Access: Ensure the path to any attic hatches or crawl space entrances is completely clear of stored items or clothing.
3. Unlock Everything: All doors, windows, gates, sheds, garage doors, and electrical panel covers must be unlocked. Keys and remotes should be left in a visible location.
4. Secure Pets: To avoid distraction or perceived hazards, pets should be crated, secured in a room with a clear sign, or removed from the property for the inspection's duration (typically 2-4 hours).
5. Leave Utilities On: All utilities—water, electricity, and gas—must be connected and fully operational for the inspector to test appliances and major systems.
Part 2: Major Systems Check-Up
A review of the home's core systems can prevent minor issues from becoming negotiation points.
6. HVAC System: Replace dirty furnace and air conditioner filters to demonstrate proper maintenance.
7. Plumbing Leaks: Conduct a visual check under all sinks and around toilets for active leaks or water stains. Repair any dripping faucets.
8. Electrical Panel and Outlets: Replace all burned-out lightbulbs to avoid ambiguity about whether the bulb or the fixture is the problem. Ensure the breaker panel is clearly labeled if possible.
9. Water Heater: For gas units, confirm the pilot light is lit. Check the base of the unit for any signs of leaking.
10. Smoke and Carbon Monoxide Detectors: Test all detectors and replace any dead batteries, as this is a critical safety item inspectors always check.
Part 3: The Interior Walk-Through
Small interior details can accumulate on a report, making a quick review worthwhile.
11. Doors and Windows: Verify that all doors and windows open, close, and lock correctly. Repair broken panes or torn screens.
12. Run the Appliances: Briefly operate the dishwasher, stove burners, and garbage disposal to confirm they are in working order.
13. Test All Faucets and Toilets: Run water at every faucet to check for pressure and drainage speed. Flush every toilet to ensure proper function.
14. Look for Water Stains: Inspect ceilings and areas around window frames for any discoloration that might indicate a past or present leak.
15. Inspect Caulking: Examine the caulking around tubs, showers, and sinks. Replacing cracked, peeling, or moldy caulk is an impactful DIY fix.
Part 4: Curb Appeal and Exterior Details
The inspection process begins with the exterior of the property.
16. Trim Landscaping: Cut back any tree branches, bushes, or vines that are touching the house siding or roof. Clear vegetation away from the foundation and the AC compressor unit.
17. Clean Gutters and Downspouts: Remove leaves and debris from gutters. Confirm downspouts are attached and direct water away from the foundation.
18. Check the Perimeter: Walk around the foundation and siding to identify any obvious cracks, damage, or signs of wood rot.
19. Secure Decks and Railings: Test all handrails and guardrails on decks, stairs, and porches to ensure they are sturdy and secure.
20. Gather Repair Documentation: Collect receipts and warranty information for any recent major work (e.g., new roof, HVAC system) and leave them for the inspector and buyer.
The Post-Inspection Negotiation Challenge
Even with diligent preparation, the post-inspection phase presents a significant challenge. The buyer's agent receives the inspection report, which is often a "dense, technical document running 40 pages or more." The subsequent task of creating a repair request is a major pain point, frequently complicated by:
• Confusing jargon
• Inflated repair estimates
• Poorly written requests
This can lead to friction, bog down negotiations, and turn the process adversarial.
A Proposed Solution: InspectionResponse.com
A tool named InspectionResponse.com is presented as a solution to this challenge. It is an AI-powered platform designed specifically for the buyer's agent to streamline the creation of a repair request.
• Functionality: The platform transforms a complex PDF inspection report into a clear, actionable, and professional repair request addendum in minutes.
• Key Features: It uses smart analysis to identify key findings and provides credible estimates for repair costs and timelines.
• Benefit to the Seller: Although sellers do not use the tool directly, they "benefit immensely" when the opposing agent does. The seller receives a well-organized, reasonable, and data-driven request, which eliminates confusion and facilitates a fair and efficient negotiation. As the source states, "It turns a potentially adversarial process into a collaborative, solution-focused conversation."
Conclusion and Final Recommendations
The guiding principle for sellers is that preparing a home for inspection is not about concealing issues but about presenting the property accurately and professionally. Following the 20-point checklist allows a seller to take control of the narrative and set a positive tone for the final stages of the transaction.
On the day of the inspection, the final step for the seller is to turn on all lights, open the blinds, and leave the property to allow the inspector and buyer to work comfortably. By investing in preparation, sellers pave the way for a cleaner report, a smoother negotiation, and a more successful sale. Furthermore, sellers can encourage their own agents to be aware of modern tools, like InspectionResponse.com, that streamline post-inspection processes and create better outcomes for all parties involved.
Study Guide
Home Inspection Preparation: A Study Guide
Quiz: Short-Answer Questions
Instructions: Based on the provided context, answer the following questions in two to three sentences each.
1. According to the guide, what are the four primary benefits for a seller who prepares their home for an inspection?
2. What is referred to as the "Inspector's Golden Rule," and why is it considered the number one reason for incomplete reports?
3. What specific preparation is required for the HVAC system and electrical panel to demonstrate proper maintenance to an inspector?
4. Why is it crucial for all utilities to be connected and operational during a home inspection?
5. What are two key exterior maintenance tasks related to water management that a seller should perform before an inspection?
6. If a seller has recently completed major work, such as installing a new roof, what should they do with the related documentation?
7. What is the recommended action for a seller to take with their pets during the 2-4 hour inspection period?
8. Describe the final steps a seller should take on the property on the morning of the inspection, just before the inspector arrives.
9. What problem in the post-inspection process was the InspectionResponse.com platform designed to solve for buyer's agents?
10. How does a seller ultimately benefit when the buyer's agent uses a tool like InspectionResponse.com to create a repair request?
--------------------------------------------------------------------------------
Answer Key
1. The four main benefits of preparation are minimizing "easy fix" findings that can clutter a report, building buyer confidence through a well-cared-for home, avoiding delays caused by inaccessible areas, and showing professional courtesy to the inspector. This preparation signals pride of ownership and helps keep the sale on track.
2. The "Inspector's Golden Rule" is that if an inspector cannot access something, they cannot inspect it. This is the primary cause of incomplete reports and follow-up visits because key areas like attics, electrical panels, or crawl spaces are blocked, forcing the inspector to schedule a return visit.
3. For the HVAC system, a seller should replace dirty furnace and air conditioner filters. For the electrical panel, a seller should replace any burned-out lightbulbs to avoid questions about faulty wiring and, if possible, ensure the breaker panel is clearly labeled.
4. Utilities—water, electricity, and gas—must be on so the inspector can test all major systems and appliances. Without active utilities, it is impossible to check the functionality of the HVAC, water heater, plumbing fixtures, or kitchen appliances.
5. A seller should clean all gutters of leaves and debris to ensure they are clear. They must also check that downspouts are properly attached and are directing water away from the home's foundation to prevent potential water damage issues.
6. A seller should gather all receipts and warranty information for any recent major work. This documentation should be left in a visible location for the inspector and buyer to review, providing proof of the updates and repairs.
7. Sellers are advised to have their pets crated, secured in a room with a clear sign on the door, or removed from the property entirely for the duration of the inspection. This prevents pets from being a distraction or a perceived hazard to the inspector.
8. On inspection day, the seller should turn on all the lights and open the blinds to let in natural light. After this, the seller should leave the property to allow the inspector and buyer to review the home comfortably and without pressure.
9. InspectionResponse.com was built to solve the challenge of turning a dense, technical, and long (40+ pages) PDF inspection report into a clear and actionable repair request. It helps buyer's agents avoid the pain point of confusing jargon and inflated estimates that can bog down negotiations.
10. A seller benefits because they receive a well-organized, data-driven, and professional repair request instead of a confusing or poorly written one. This clarity eliminates friction, sets the stage for a fair and efficient negotiation, and turns a potentially adversarial process into a collaborative, solution-focused conversation.
--------------------------------------------------------------------------------
Essay Questions
Instructions: The following questions are designed for longer, essay-style responses. Use the information and arguments presented in the source text to construct a thorough analysis. No answer key is provided.
1. Discuss the psychological impact of a well-prepared home on a potential buyer and their agent during the inspection process. How does the 20-point checklist contribute to building trust and goodwill, and why is this important during negotiations?
2. Explain the concept of "Accessibility is Key" in the context of a home inspection. Detail the five checklist items related to accessibility and analyze how failing to address each one could negatively impact the sale process, causing delays, added costs, or an incomplete assessment of the property.
3. The guide divides the pre-inspection checklist into four categories: Accessibility, Major Systems, Interior Details, and Exterior Areas. Analyze how these categories work together to present a comprehensive picture of the home's condition and argue which category, if neglected, poses the greatest risk to a successful real estate transaction.
4. Analyze the journey from the completion of the physical inspection to the start of negotiations. Describe the typical inspection report, the challenges it presents, and how modern tools like InspectionResponse.com are designed to streamline this specific phase of the transaction for all parties involved.
5. The text states, "Preparing your home for inspection isn’t about hiding problems; it’s about presenting your home accurately and professionally." Using specific examples from the checklist, elaborate on this statement and explain how proactive preparation helps a seller take control of the narrative of their home's condition.
--------------------------------------------------------------------------------
Glossary of Key Terms
Term
Definition
Accessibility
The ability for a home inspector to physically reach and examine all necessary areas and systems of a property, such as the furnace, electrical panel, attic, and crawl spaces. It is cited as the "Inspector's Golden Rule."
Downspouts
Pipes that carry rainwater from a roof's gutters down the side of the house and away from the foundation. The checklist recommends ensuring they are attached and directing water properly.
Home Inspection
A process where a professional inspector conducts a detailed examination of a property's condition on behalf of a potential buyer. The outcome can significantly impact the real estate transaction.
Inspection Report
A detailed, technical document, often 40 pages or more, that outlines the inspector's findings about a property's condition. This report forms the basis for any subsequent repair requests from the buyer.
InspectionResponse.com
An AI-powered platform mentioned in the text that helps a buyer's agent convert a complex PDF inspection report into a clear, professional, and actionable repair request addendum.
Major Systems
The critical operational components of a home, including the HVAC (heating, ventilation, and air conditioning), plumbing, electrical systems, and water heater.
Red Flag Items
Significant issues or findings in an inspection report that could cause concern for a buyer and potentially endanger a real estate deal. Proper preparation aims to minimize these.
Repair Request
A formal request, also called an "inspection response," submitted by the buyer to the seller after the inspection. It details the issues found in the report that the buyer wants the seller to address, either through repairs or financial concessions.
Utilities
Essential services connected to a home, specifically water, electricity, and gas. These must be operational for an inspector to fully test the property's systems and appliances.
Frequently Asked Questions
1. Why is it so important for me, as a seller, to prepare for a home inspection?
As your advisor, I stress that preparation is not about cleaning—it's about strategy. A well-prepared home disarms criticism, builds invaluable buyer trust, and protects your negotiating leverage. The key benefits are clear:
• Minimize "Easy Fix" Findings: Many items flagged by inspectors are minor issues like a dripping faucet or a burned-out lightbulb. Addressing these simple fixes beforehand prevents them from cluttering the final report and making small problems appear more alarming than they are.
• Build Buyer Confidence: A clean, accessible, and well-maintained home demonstrates pride of ownership. This sends a powerful psychological signal to the buyer that the property has been cared for, which is invaluable when it comes time to negotiate.
• Avoid Delays: If an inspector cannot access a key area like the electrical panel or attic, they will have to schedule a return visit. This not only causes delays in the transaction timeline but can also add unnecessary costs.
• Show Respect for the Process: Facilitating the inspector's job by ensuring the home is ready is a professional courtesy. It reflects positively on you as the seller and helps set a cooperative tone for the remainder of the sale.
By understanding why preparation is so critical, you can better focus on what needs to be done, starting with the single most important rule of the day.
2. What is the single most important rule to follow for the inspector's visit?
The paramount goal for a seller is to ensure the inspector can conduct a complete and efficient evaluation, and that hinges on one principle: total accessibility.
The "Inspector's Golden Rule" is simple: if an inspector cannot access something, they cannot inspect it. An inaccessible furnace or a locked shed doesn't just get a pass; it gets marked as 'unable to inspect,' introducing doubt and creating a problem that must be solved later. This is the #1 cause of unnecessary delays, costly return visits, and buyer anxiety—all of which can be completely avoided.
3. What specific "accessibility" tasks should I complete?
Ensuring full access goes beyond unlocking the door. Think of this as the first major category of your preparation: Accessibility. If an inspector can't see it, they can't clear it. Here are the five non-negotiable tasks.
1. De-Clutter Key Areas Clear a space of at least three feet around the furnace, water heater, air conditioner, and electrical panel. Remove any boxes, furniture, or storage that would prevent the inspector from safely working with and evaluating these systems.
2. Grant Attic and Crawl Space Access Ensure the path to any attic hatches or crawl space entrances is completely clear. If the access point is located inside a closet, remove clothing, boxes, and any other stored items that block the entrance.
3. Unlock Everything Every point of entry and every utility space must be accessible. Unlock all doors (interior and exterior), windows, gates, sheds, and electrical panel covers. Leave all necessary keys and garage remotes in a visible location, such as the kitchen counter.
4. Secure Your Pets For the safety and comfort of both your pets and the inspector, they should be secured during the visit. Plan to have them crated, kept in a designated room (with a clear sign on the door), or removed from the property for the 2-4 hour duration of the inspection.
5. Leave Utilities On The inspector must be able to test the home's major systems. Ensure that the water, electricity, and gas are all connected and fully operational. A home with disconnected utilities will result in an incomplete inspection.
4. Which major systems in my home require a pre-inspection check-up?
You aren't expected to be a professional contractor, but a pre-inspection check of your home's major systems is a high-impact strategy. These simple checks can prevent minor issues from being flagged as major concerns on the final report.
• HVAC System: Replace any dirty furnace and air conditioner filters. This simple, inexpensive task is a clear visual indicator of regular maintenance.
• Plumbing: Perform a quick visual check for active leaks under all sinks and around the base of toilets. Address any dripping faucets, which are a common and easily fixable finding.
• Electrical: Replace all burned-out lightbulbs. This eliminates any ambiguity for the inspector, who would otherwise have to determine if the issue is a simple bulb or a more complex wiring problem. If possible, ensure your breaker panel is clearly labeled.
• Water Heater: For gas models, confirm that the pilot light is lit. Look for any signs of leaking at the base of the unit.
• Safety Detectors: Test all smoke and carbon monoxide detectors to ensure they are functioning. Replace any dead batteries, as these are critical safety items that are always checked.
With these large systems addressed, your focus can shift to the smaller interior details that collectively make a big difference.
5. Are there small interior details that inspectors really notice?
Yes, absolutely. Buyers often judge a home's overall health by the small details. A series of minor, easily fixable flaws can create a false impression of neglect, giving the buyer unwarranted negotiating power. Your goal here is to eliminate that perception.
• Doors and Windows: Operate every door and window to ensure they open, close, and lock properly. Repair any broken window panes or torn screens.
• Appliances: Briefly run the dishwasher through a cycle, turn on all stove burners, and test the garbage disposal to confirm they are in working order.
• Faucets and Toilets: Turn on the water at every faucet to check for adequate pressure and proper drainage. Flush every toilet to ensure it functions correctly and does not continue to run after the tank is full.
• Water Stains: Look carefully for any discoloration on ceilings (particularly under bathrooms) and around window frames that could indicate a past or present leak.
• Caulking: Examine the caulk around tubs, showers, and sinks. If it is cracked, peeling, or shows signs of mold, applying a fresh bead is a simple DIY fix that makes a significant visual impact.
After reviewing the home's interior, it's time to turn your attention to its exterior presentation.
6. What should I focus on when checking my home's exterior?
The home's exterior provides the inspector's first impression, setting the tone for the entire evaluation. A well-maintained exterior suggests that the rest of the home has been cared for with similar diligence.
• Trim Landscaping: Cut back any tree branches, bushes, or vines that are touching the house siding, roof, or the exterior AC compressor unit. Clear vegetation away from the foundation to allow for a clear view.
• Clean Gutters and Downspouts: Remove leaves and other debris from gutters to ensure they are clear. Check that downspouts are securely attached and effectively direct water away from the home's foundation.
• Check the Perimeter: Walk around the foundation and siding to look for any obvious cracks, damage, or signs of wood rot that may need attention.
• Secure Decks and Railings: Test all handrails and guardrails on decks, stairs, and porches to confirm they are sturdy and securely fastened.
Alongside this physical preparation, providing clear documentation can be equally important.
7. Should I provide any specific documents for the inspector?
Yes, providing documentation for recent major improvements is a powerful tool for building trust and providing essential clarity. It moves beyond claims of maintenance to offering concrete proof.
You should gather and leave out any receipts and warranty information for recent, significant work. This includes items such as a new roof, a recently replaced HVAC system, updated electrical work, or other major upgrades. Leaving this information in a visible place for the inspector and buyer demonstrates due diligence and provides valuable context that can answer questions before they are even asked.
8. What is the best way to handle the actual day of the inspection?
On the day of the inspection, your primary role is to create a welcoming environment for the inspector and buyer, and then to step aside to allow them to do their work. The process is simple and professional.
First, prepare the house by turning on all the lights and opening the blinds to make every room bright and easily visible. Second, and most importantly, you and your family must leave the property for the entire 2-4 hour duration. It is standard, professional practice for the seller to be absent. This allows the inspector and buyer to speak openly and review the home thoroughly without making anyone feel uncomfortable.
9. What happens after the inspection is finished?
Once the physical inspection is complete, the focus shifts from your property to the official report and the negotiation phase that follows.
The buyer's agent will receive a dense, technical report—often 40 pages or more—detailing the inspector's findings. They will then collaborate with the buyer to review this information and prepare what is known as an "inspection response" or repair request. This document outlines the items the buyer would like you, the seller, to address. This stage is a common source of friction in real estate transactions and can complicate negotiations if not handled clearly and professionally.
10. How does a tool like InspectionResponse.com, used by the buyer's agent, help me as the seller?
While you, as the seller, do not use a platform like InspectionResponse.com directly, its adoption by the buyer's agent creates significant downstream benefits that make your side of the transaction smoother and fairer.
Instead of receiving an ambiguous or emotionally charged list of demands, you are presented with a clear, data-driven repair request. The platform provides context, like credible cost estimates, which transforms a potentially adversarial negotiation into a collaborative, solution-focused conversation about facts, not feelings. This clarity eliminates confusion and sets the stage for a more efficient and equitable resolution for both parties.
Remember, preparation is about control. By presenting your home accurately and professionally, you control the narrative, streamline negotiations, and set the stage for a successful close on your terms.